

Make a set of handy templates to help you set up a compound miter saw for common crown molding cuts. (Note: These instructions are for molding with a 45⁰ spring angle. Adjustments for a 38⁰ spring angle are given at the end.) You will need four templates: two for outside corners and two for inside corners. To make them, you need about 6′ of scrap crown molding.
First, set a left bevel (vertical tilt to the left) of 30⁰ on your compound miter saw. This bevel angle will not change for any cut. Also, your molding will always lay flat, face up, on the miter saw. Moreover, as you make each template, mark the set-up instructions directly on the template (as shown in the photo). Each template should be at least 6″ long. Following are the instructions for each template.
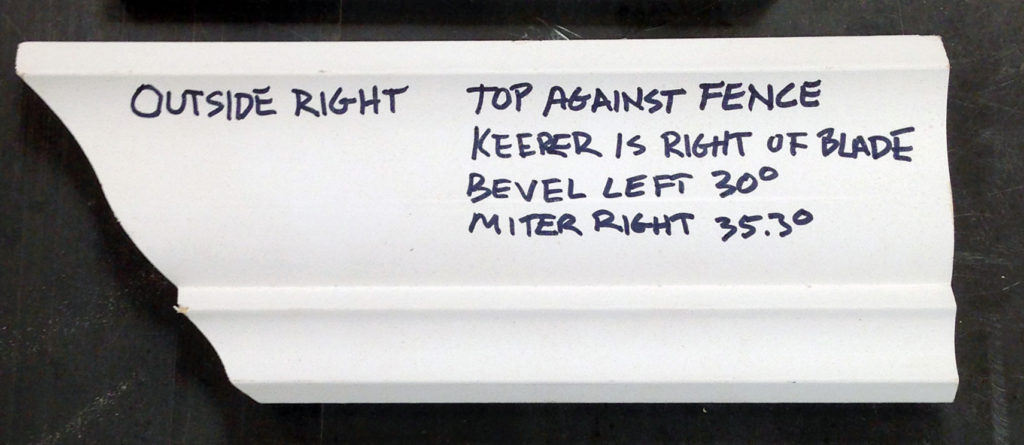
Outside right template:
- Top of molding against the fence.
- “Keeper” is exemplary of the blade.
- Bevel left at 30⁰.
- Miter right at 35.3⁰.
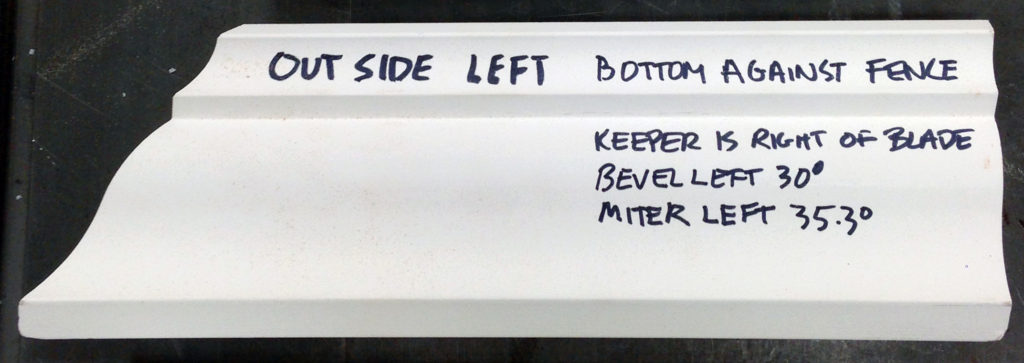
Outside left template:
- Bottom of molding against fence.
- “Keeper” is the right of the blade.
- Bevel left at 30⁰.
- Miter left at 35.3⁰.
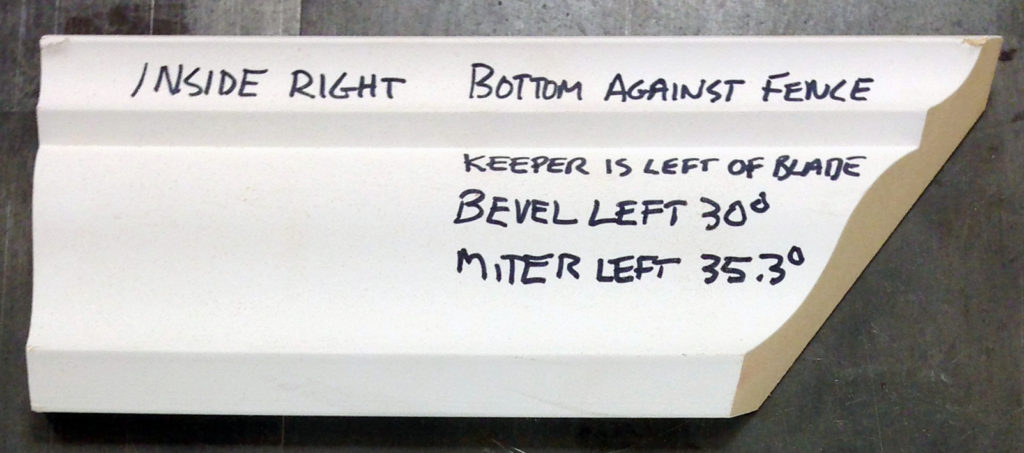
Inside right template:
- Bottom of molding against fence.
- “Keeper” is left of the blade.
- Bevel left at 30⁰.
- Miter left at 35.3⁰.
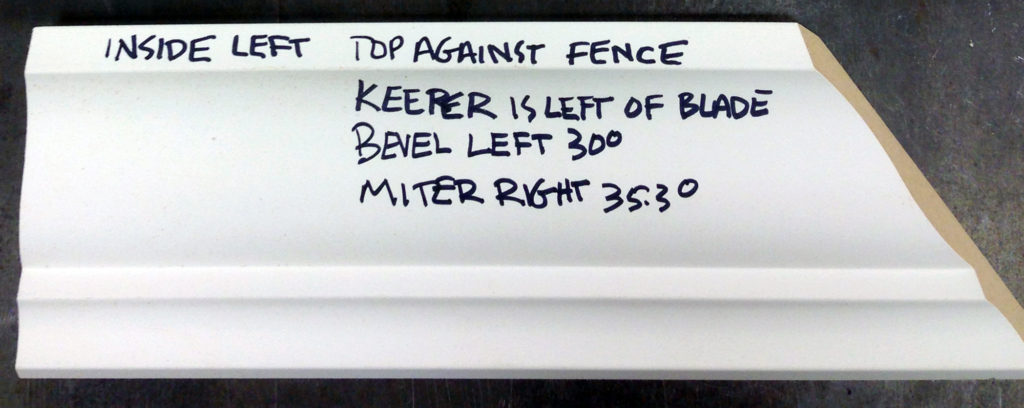
Inside left template:
- Top of molding against fence.
- “Keeper” is left of the blade.
- Bevel left at 30⁰.
- Miter right at 35.3⁰.
Now, with these templates, you will never have to scratch your head and make many “test” cuts. Simply place the template against the wall to ensure you have the correct one, and then use the instructions to make the proper cut.
Note: For molding with a spring angle of 38⁰, use a bevel angle of 33.9⁰ and a miter angle of 31.6⁰ instead of the angles given in the instructions above.

